How does your garden grow?
With slugs aplenty and….
We rent a large house in the suburbs of Seattle. It is mostly shaded in the back of the house because there are several large trees. We’ve rented for almost two years in this same house and I decided that this year (since we’re going to renew our lease that is up end of July) that I would work harder and better at a garden. Last year my garden consisted of one bed in the backyard that only grew potatoes from my compost pile. The compost pile was nowhere near the garden bed… My housemate was able to eke out some tomatoes in the front yard. I decided in April that I would build this beautiful garden… While many of my fellow Seattlelites were already transplanting their seeds I was sourcing heat treated pallets and breaking them apart with curses, hammers, and finally – a saw. I experienced a bit of expectation vs. reality with this project. How hard could it be to break apart pallets and build up some nice square raised garden beds? Building all of them in one weekend was doable, right? Thanks to Youtube, I was naively hopeful that it could be done. Fast forward multiple weekends, and finally my project is complete. Check it out!
I may have made a number of mistakes planting and creating this garden so let me know! I’m trying to learn before I make the mistakes, but as a newbie to gardening and taking on quite a big project, I’m sure I’ve made many mistakes. One of which I know is relying on hand watering… I’ve been watching the Youtube uploads from Huw Richards and Epic Gardening to learn more about gardening and specific plant care, but there is so much to learn!
Front yard – my ‘orchard’ – the three largest pots have 2 tomato starts in each of a different cherry tomato variety. I also have three felt pots with two different tomato varieties and two hard plastic medium pots with two more different tomato varieties (6 different kinds of tomatoes). I have one Meyer lemon tree and two medium plastic pots with three strawberry starts in each.

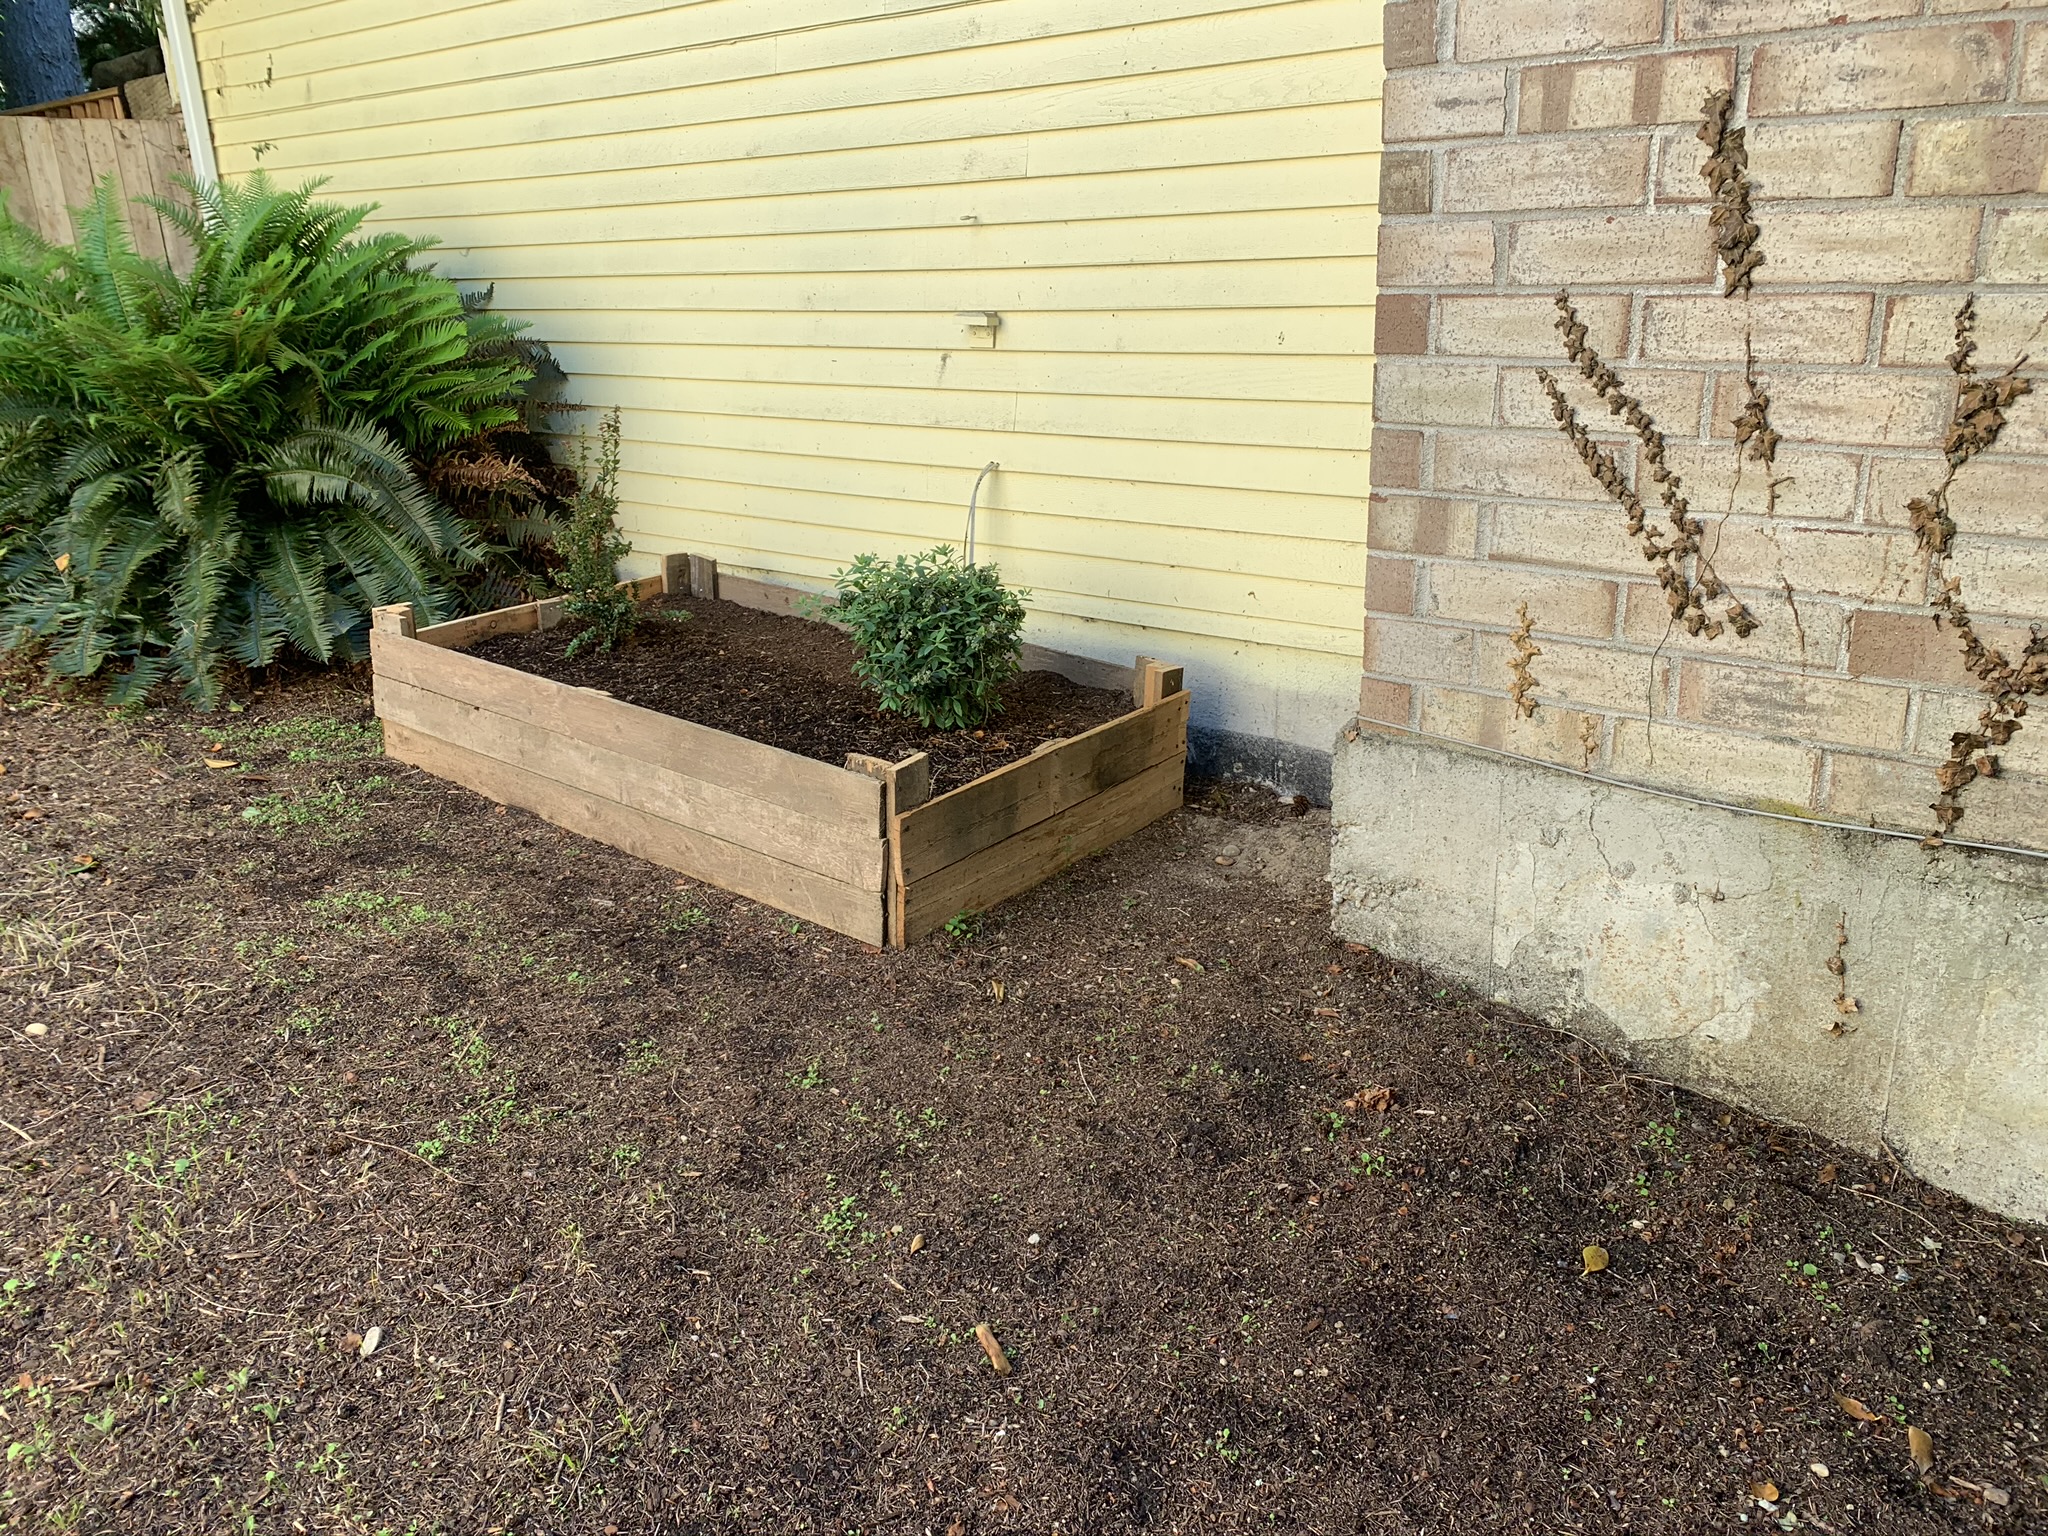
The side yard – my ‘berries’ – I have a Sunshine Blue bush start and a Huckleberry Native Star bush start currently and will be adding a thimbleberry plant start and a salmonberry plant start when I pick them up from a local nursery this weekend. I also planted my parsley and cilantro seeds (probably in vain at this time of year and in this much shade) on the insides of the box.
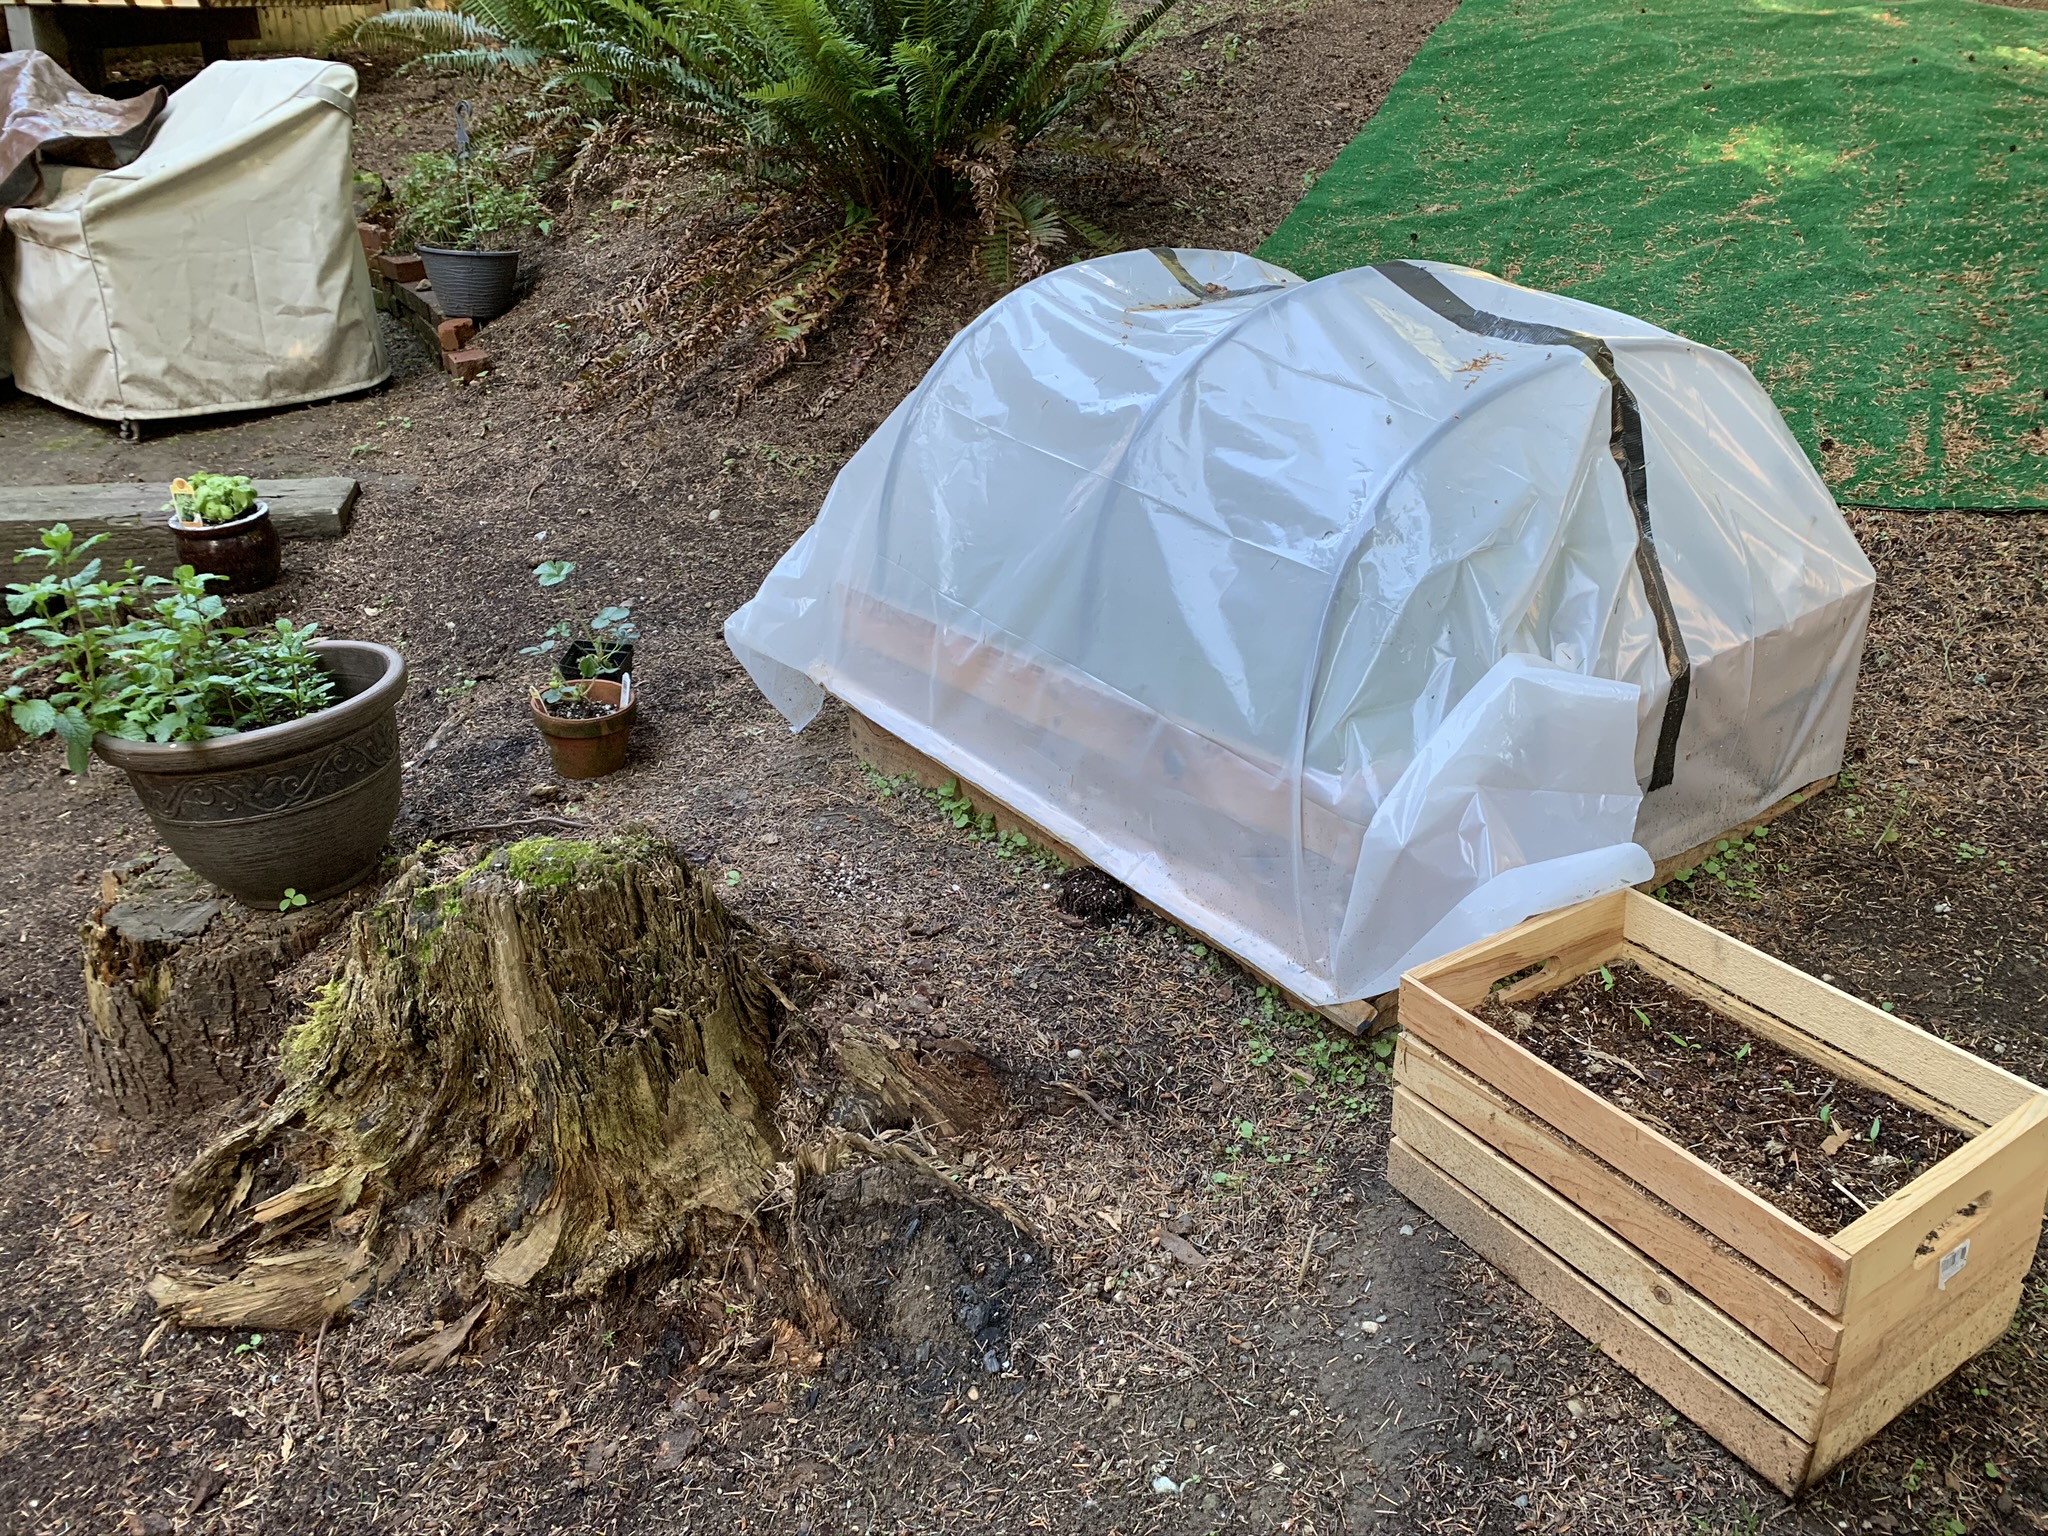
The backyard – ‘greenhouse’ – we finished this planter box first and immediately planted a salad mix in the front from seed (two rows) and planted my zucchini seedlings that I grew indoors. I also placed my free orange pepper start, snacking pepper starts, and cauliflower seed starts inside this greenhouse with limited success (as you can see). Next to this greenhouse planter I have some of the snacking peppers transplanted into this cedar box. My housemate has her thriving two varieties of mint. I also have two small plastic pots with two more strawberry plants and the slugs’ favorite meal: our second attempt at growing basil outside.

The backyard raised bed garden – the big ‘project’ – three raised garden beds that I’ve probably over-planted. Most of them I planted direct with seeds, except for transplanting my healthy-looking extra zucchini starts (Don’t worry, I love zucchini). I attempted to level the ground (with limited success because one of the effects of all that shade from the trees is that the yard is littered with roots).
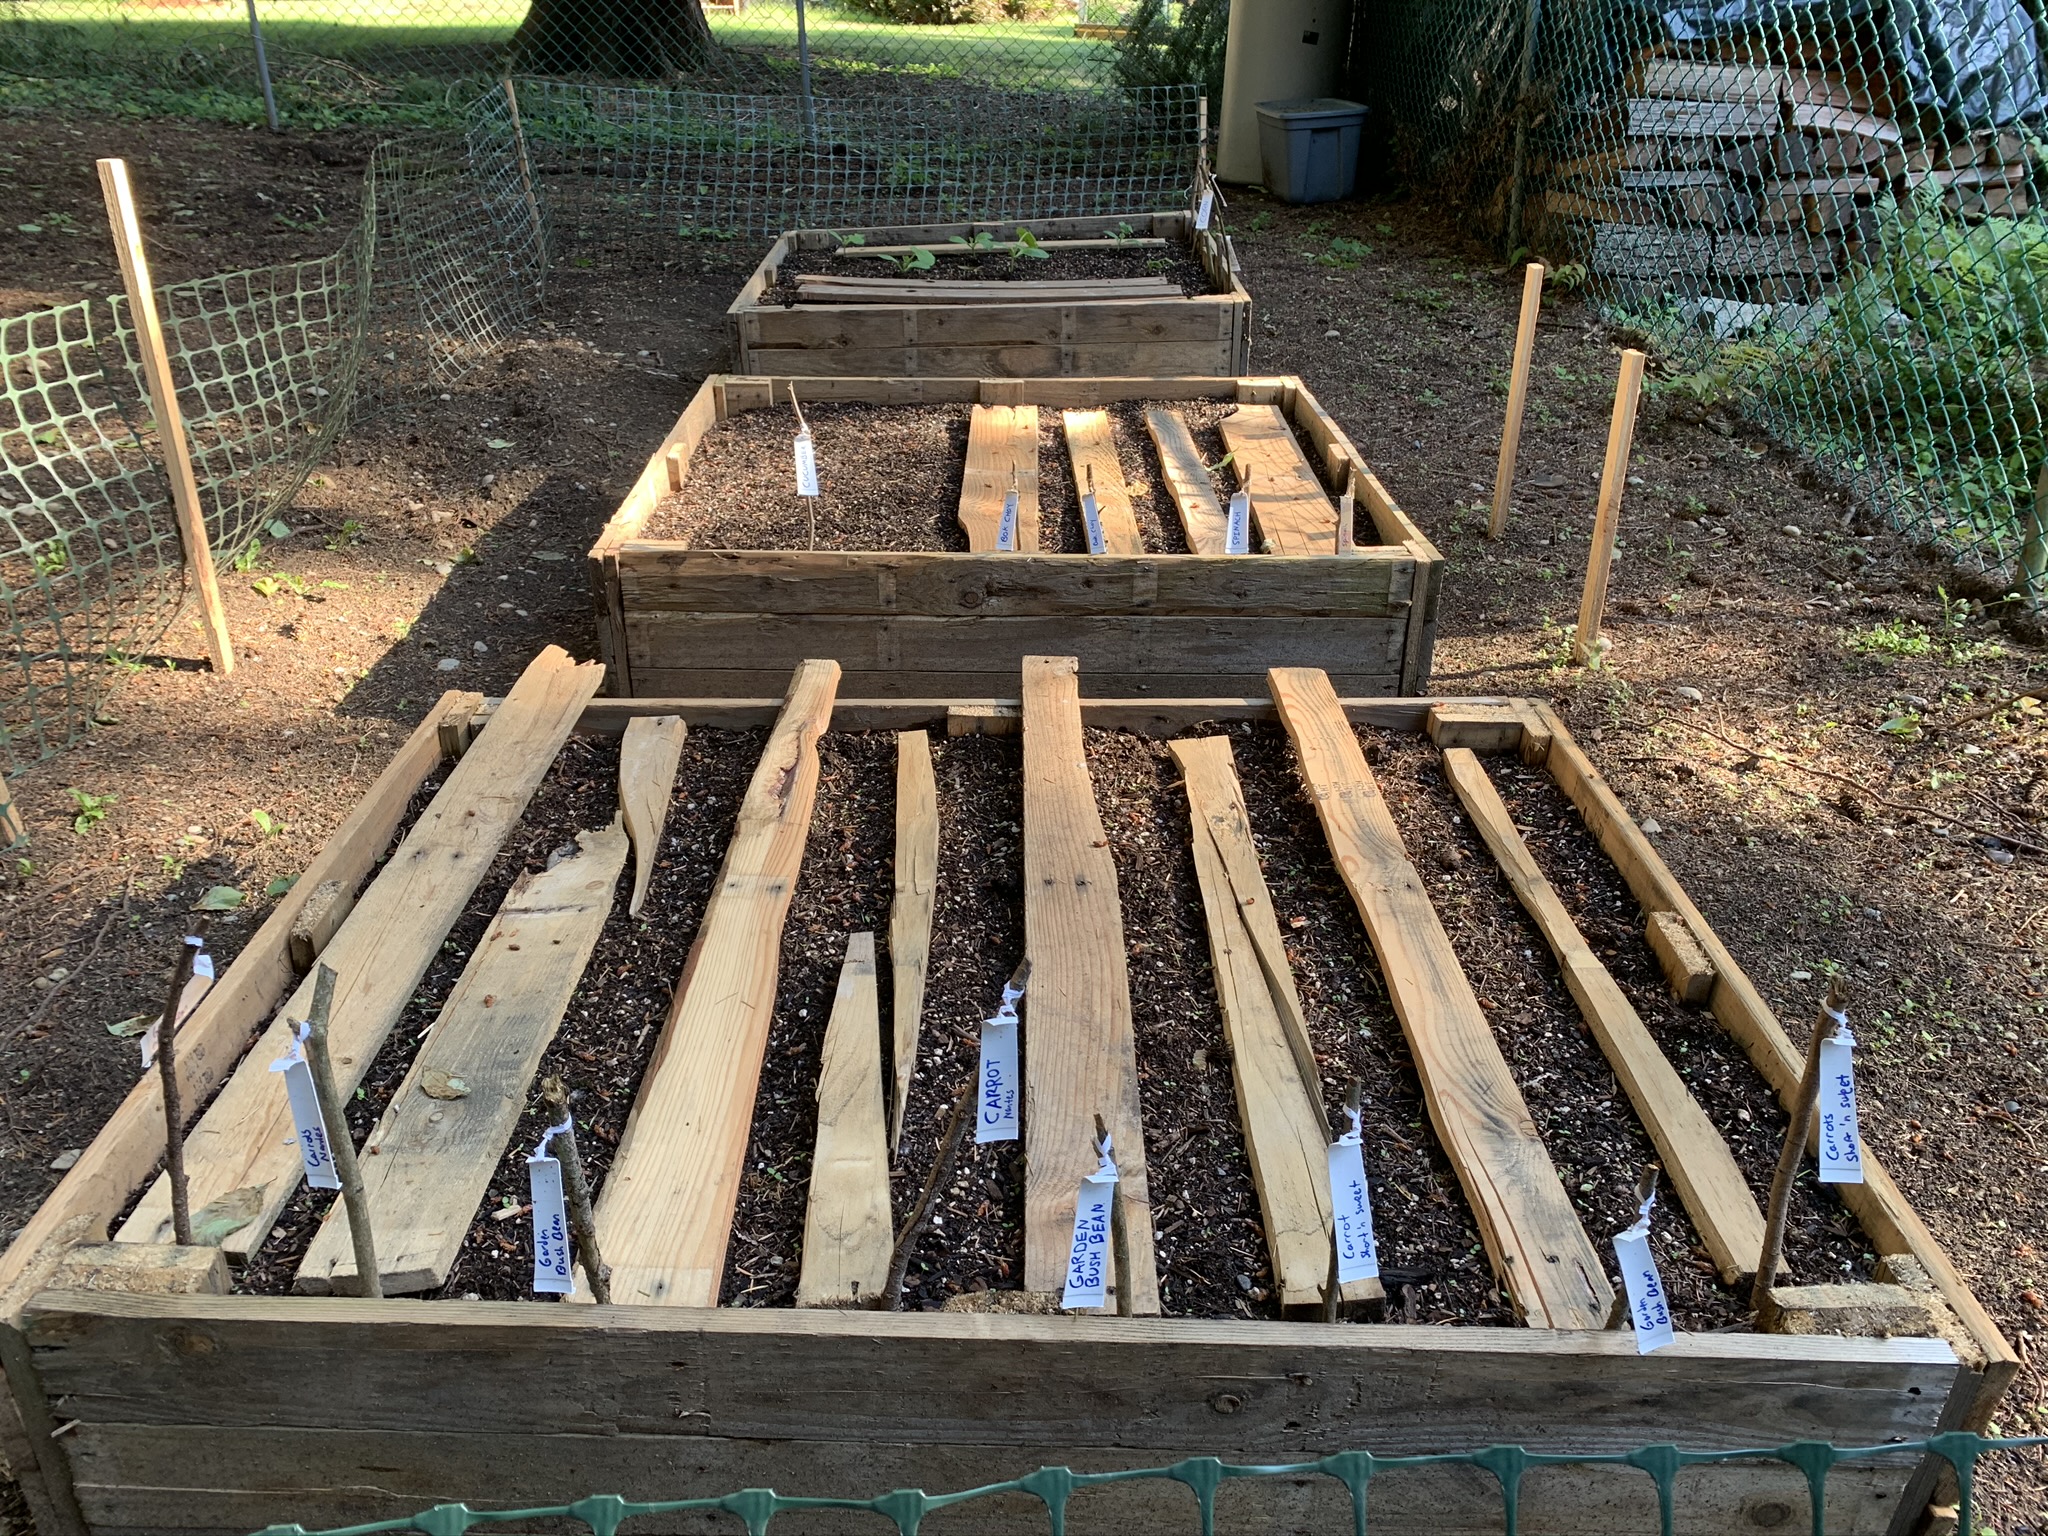

The beds have the following planted in them:
Bush Beans
Carrots Nantes
Bush Beans
Carrots Nantes
Bush Beans
Carrots Short ‘n Sweet
Bush Beans
Carrots Short ‘n Sweet
Spinach
Spinach
Chard
Chard
6 cucumber mounds
4 rows of corn
6 zucchini starter mounds
1 row of mounds of cauliflower seeds
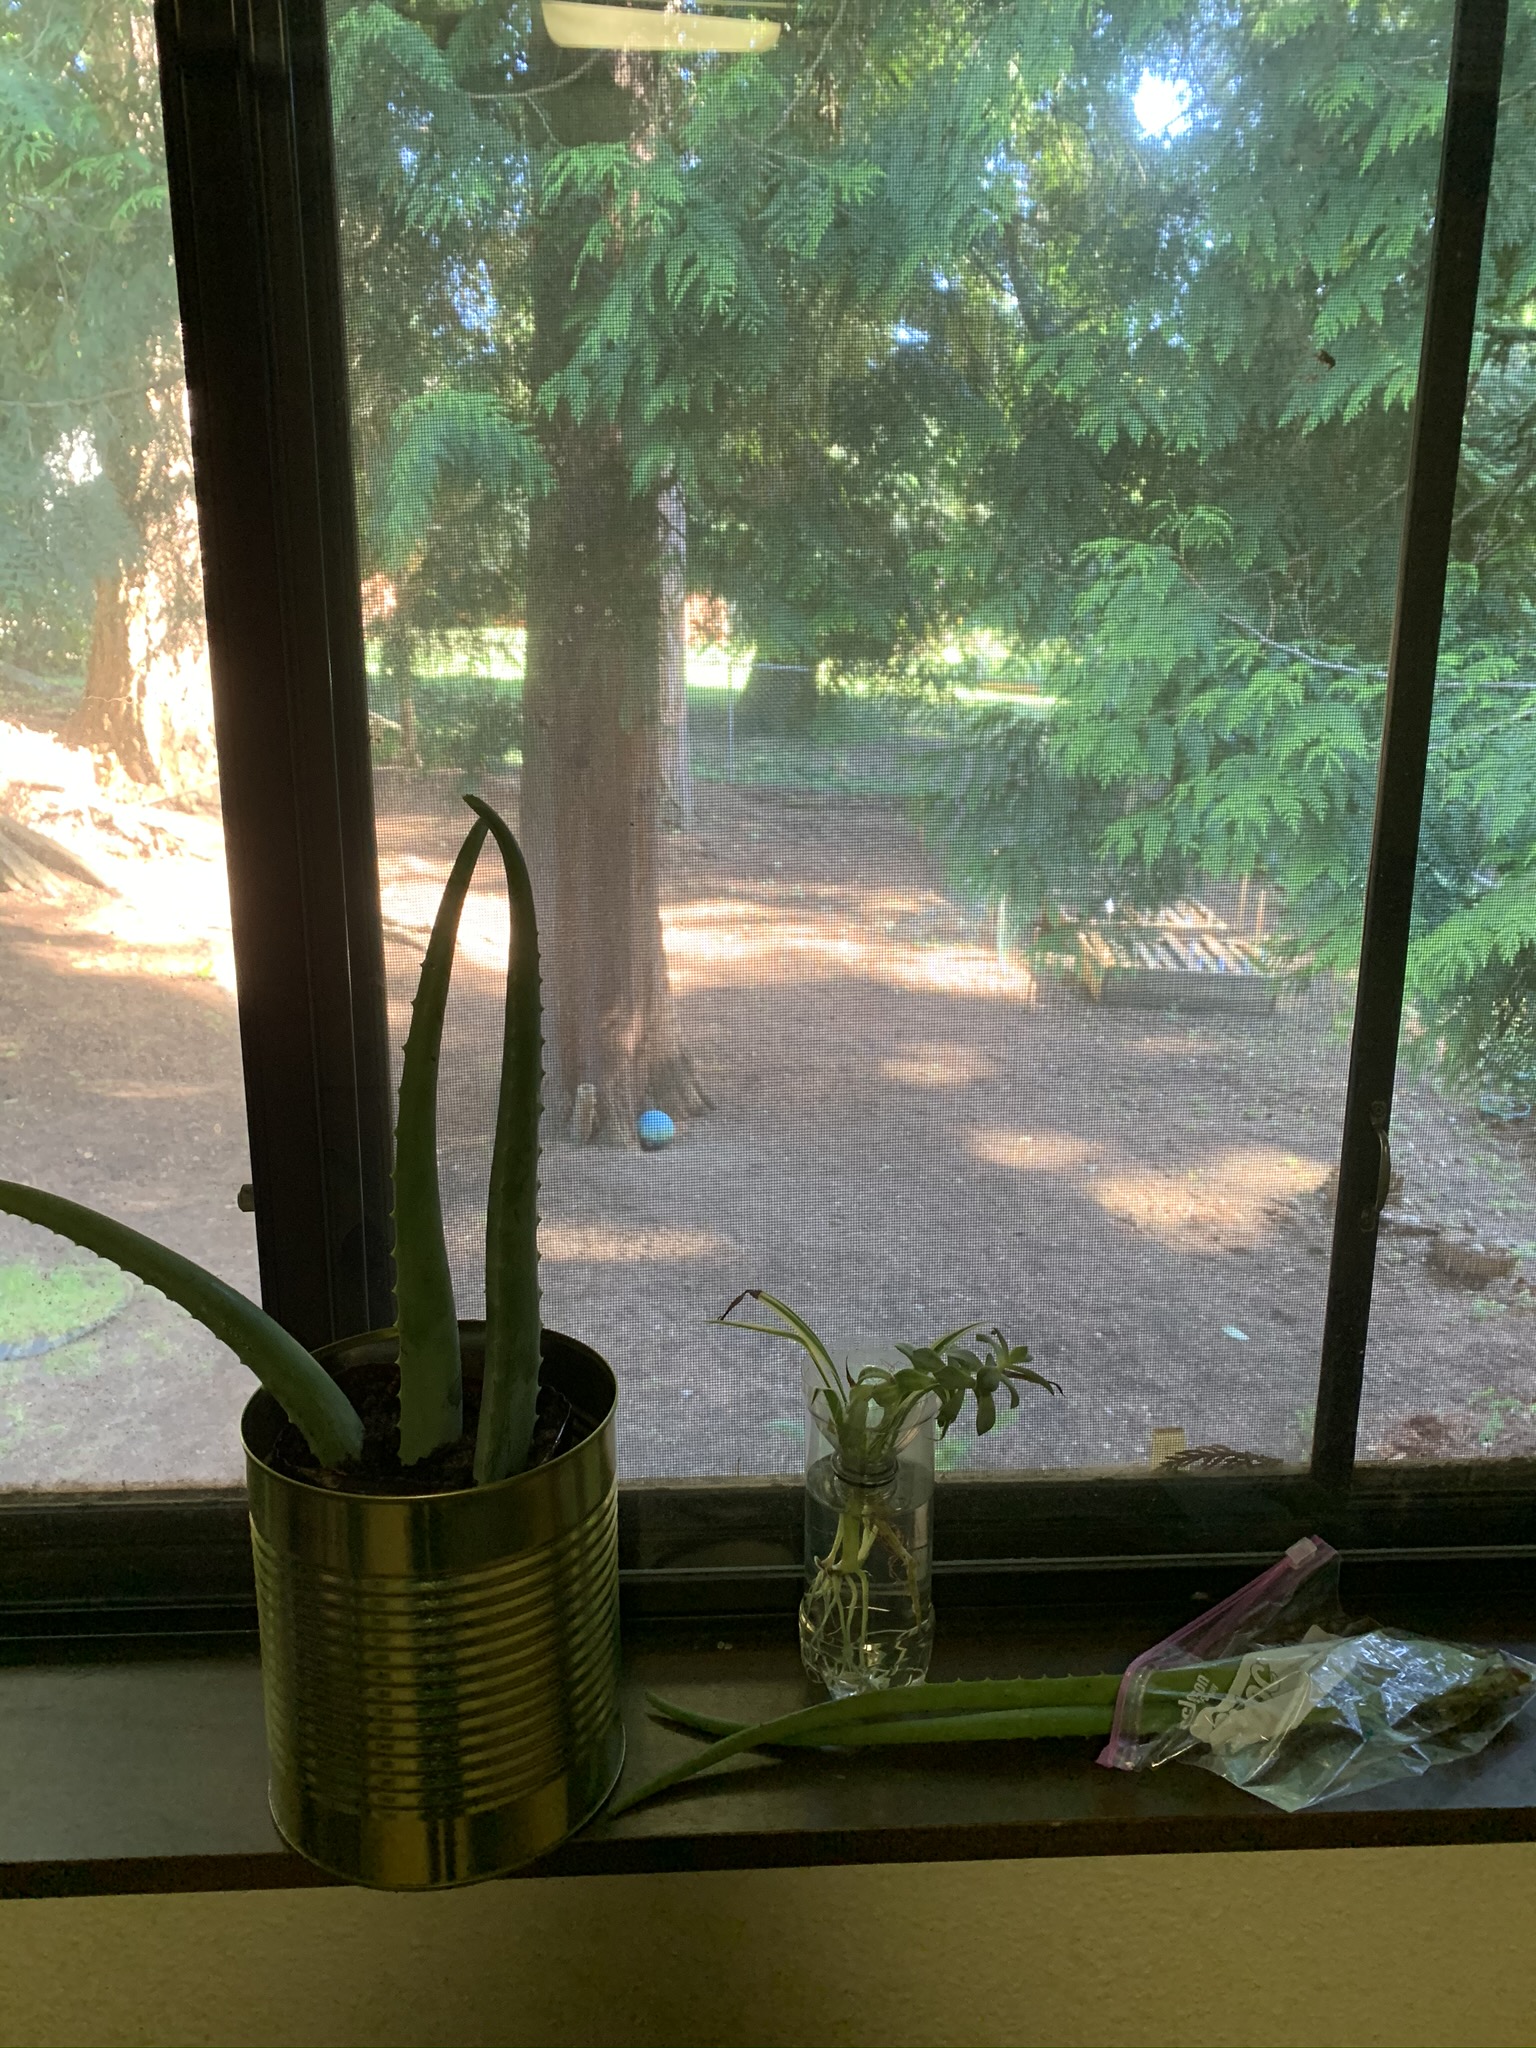
Finally – my indoor ‘garden’ consisting of my attempt to re-pot aloe cuttings, a spider plant ready to be potted (as soon as I find another suitable pot) and more aloe cuttings ready to be potted. I also have a spider plant in the kitchen that I’ve re-potted and placed there for optimal sunlight.
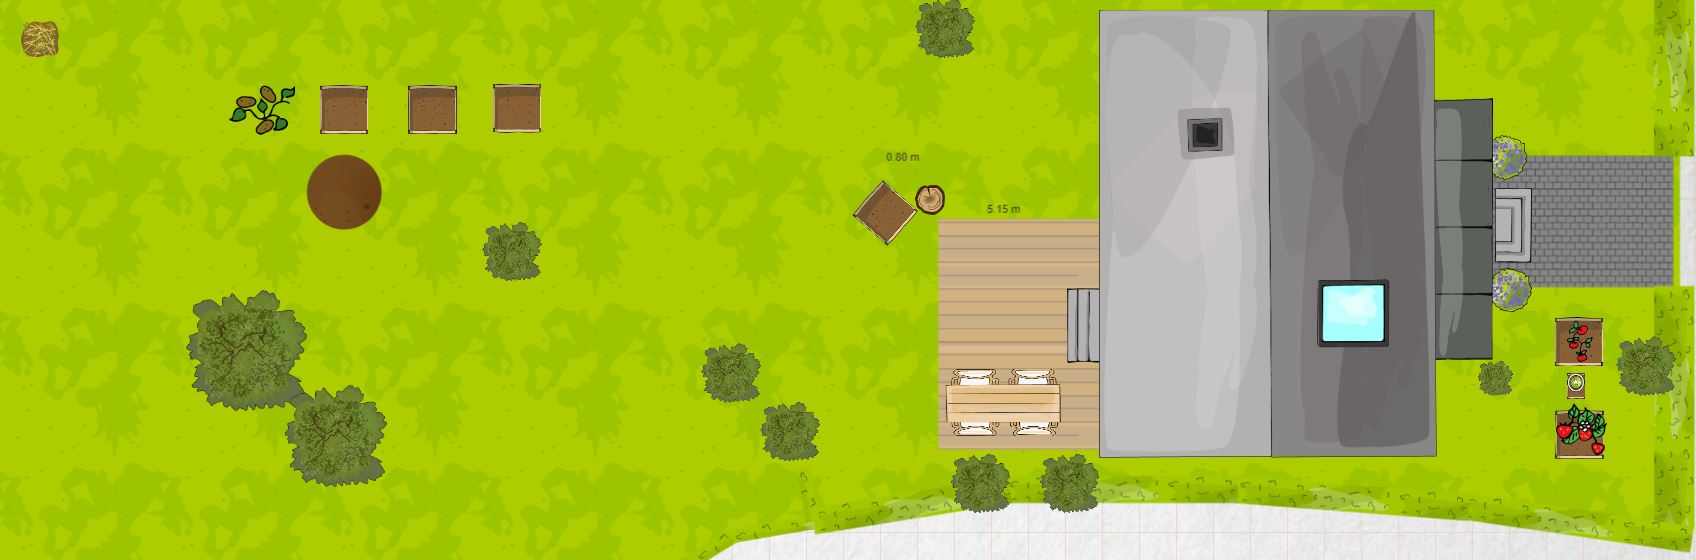
Before planting I researched what I could grow that was ‘shade tolerant’ and then sketched out the spacing and which plants to group together. I also made a master matrix of what the seeds were and when I planted them and where so I can keep track of harvest times and plant needs. Check out this loose sketch of my raised bed locations (brown squares).
Total cost invested: $222.16 + use of tools, parts and seeds purchased by housemate + gifts + use of car to pickup free materials + time
Continuing costs and future projected costs: Fertilizer/plant food and water.
Some notes on my compost system:
Our house has been composting over a year. I have a small bucket with a lid I got from Goodwill for $2 that we fill up at least twice/week. It sits on the counter next to our water filter. I found a free storage tub (plastic) that I drilled small holes into the lid and the bottom. I placed this bin in the far corner of the yard (farthest from the house). I mix in some mulchy leaf droppings in between the layers of compost but the bucket fills up so fast! I don’t quite know what to do with the partially composted organic materials so I dug a hole in the yard and dumped the compost there so I could keep using the compost bin. I then dug up this compost and placed it at the bottom of my raised garden beds this year. My dad gave me a tall rain barrel that I will use for my rotated compost this year since we don’t want to remove the gutter piping on our rental and there isn’t a good spot to place it in our yard. My new rain water collection system is to place two buckets in the most prime rain collection spots in the yard (which I noticed from the dip in the dirt where the water had worn it away and tested with a bucket that filled up overnight from rainfall). After it rains I take these filled buckets and dump them into a smaller rain bucket my dad gave me for storage.
Some notes on our raised pallet garden project:
Taking apart the pallets was a chore and before we used a mallet, we were using a hammer. We kept breaking and splitting the boards with the hammer, and even damaged some boards with the mallet. I suggested we use the reciprocating saw to saw out the back end of boards (making 1′-1/5′ length cut boards) and then we could mallet out the other side. This system worked quite well, especially with the pallets with three reinforcing boards in the middle. I used the small boards on the ends and the middle parts of the sides of the beds. The nail gun was very useful for this first part – nailing the small boards to the sides of the raised beds. I stacked two of the smaller boards on top of each other for two of the raised bed sides so that when I propped all the sides upright and nailed/screwed them into the box, there was more structure and reinforcement. I was able to build several beds without a second pair of hands because I used some of our extra red bricks to prop up the sides and push them together. Having use of the power tools was very helpful!
Here are some handy resources I used as I planned our garden and my DIY project:
https://www.onehundreddollarsamonth.com/how-to-make-a-recycled-pallet-vertical-garden/
https://web.uri.edu/sgi/files/DIY-Pallet-Garden-Instructions.pdf
https://www.penniesintopearls.com/diy-pallet-wood-raised-garden-beds/
https://www.instructables.com/id/How-to-make-a-raised-bed-garden-box-from-wood-pall/
https://www.gardeners.com/kitchen-garden-planner/preplanned-gardens?id=Plant_It_and_Forget_It
Here is the breakdown of costs and materials and equipment used:
Materials: $14.58 + cost invested by housemate
- Free: Manure – horse manure used as bottom layer for the raised beds (about 1 board height). Received approximately 12 garbage bags’ worth from Next Door as well as 1 wheelbarrow load 1 mile walked from Facebook BuyNothing post
- Free: Plastic fencing – 3 lengths free from Next Door
- Free: 2 HT pallets my housemate had procured last year
- Free: 7 HT pallets and 1 piece of fencing from Next Door (picked up within 2 miles of a refurbished garage fridge). I sent over 10 messages asking about HT pallets from listings on Next Door
- Free: 1 HT pallet from Facebook post that my housemate picked up in her larger vehicle
- Free: Crunch Fabric Pots 3 gallon, 5 pack Breathable Fabric Grow Bags Black Felt from Ebay for $16.50
- Free: Various planters and plant pots my housemate owned
- Free: Wood crate I was gifted from a friend
- Free: Tomato supports my housemate owned from a previous year
- Tubing and a plant tarp my housemate bought from Home Depot to create our DIY greenhouse
- Free: Plastic Tupperware I cut up and drilled a hole through and then used sandwich ties to twist tie them to stick pieces as garden markers
- $6.59 cactus soil for the aloe cuttings from my local Town Center Hardware Store (I walked there)
- 1 bag of potting soil for raised beds from Costco for $7.99
- Two bags of raised bed potting soil from Town Center Hardware Store for $10/each that my housemate bought
Tools: $32.05 + cost invested by housemate
- Free: Wheelbarrow gifted to me by my dad
- Free: Rain barrel/compost bin gifted to me by my dad
- Free: Compost bin I bought a few years ago as a plastic storage tub and drilled holes into to create my DIY compost bin
- Free: Nail gun and nails loaned to me by my dad
- Power drill my housemate owns
- Reciprocating saw my housemate owns
- A new saw blade for cutting wood and nails for approximately $12 that my housemate bought for the project
- Old 2″ and 1″ screws my housemate owned and gave to the project
- Screws from Amazon for $8.97 Grip Rite PTN212S1, Gray 2.5″ long #8
- 2″ wood screws and 2″ nails for the nail gun from Town Center Hardware for $14.08
- Fiskars Micro-Tip Pruner Non-Stick Blades, Orange/Black (399211-1003) from Aamzon for $9
Seeds, Plants, Starts: $175.53 + cost invested by housemate
- Free: Aloe cuttings from post referencing a post in BuyNothing on Facebook.
- Free: Spider plant cuttings (2 root balls) from BuyNothing on Facebook
- Free: 5 plant starts from Facebook offer – I chose 4 tomatoes: sweet million, sun sugar, pineapple, and sun gold as well as an orange pepper plant from her offerings.
- Free: A work friend offered his friend’s tomato starts and I received 2-3 starts for 5 varieties of cherry tomato varieties
- I bought a Blueberries – Sunshine Blue plant start, Huckleberries Native Star plant start, and Improved Meyer Lemon tree from JB Instant Lawn in Redmond for $121.95
- My housemate bought the following seed packets from Home Depot: Corn Early Sunglow Hybrid, Summer Squash Black Beauty, Cauliflower Early Snowball, Carrots Short N’ Sweet, Carrots Nantes Half Long, Cucumbers Chompers Hybrid, Bok Choy Chinese Mustard, Garden Bean Bush Blue Lake 274, Mesclun Spicy Mix, Perpetual Spinach Green Leaf Chard.
- Basil plant from a local ‘plant sale’ for $3
- I bought the following seeds: parsley and cilantro from my local Town Center Hardware store for $2.75/each (I walked there)
- I bought a mystery packet of 100 mixed seeds off of Amazon for $2.64 and loofah seeds for $2.84
- I bought a thimbleberry plant start, a salmonberry plant start, and a rhubarb plant start for $39.60 from NW Bloom EcoLogical Services in Redmond

I love the idea of thimbleberry and salmonberry plants. I will work on getting them put in at Riverside next summer. You will have to keep us updated on how well they grow. They are native to the area, but I feel like they need mix of sun and shade.
LikeLike
I’m not quite sure what size I’m getting but I’ll definitely post a mid-season and post-season update!
LikeLike
Pingback: 2020 Q2 Goals – Accountability, Check in, and an Uneventful Spring | Rachel Author Barnard
Pingback: DIY Garden 2020 – Partial Shade PNW Zone 8b/9a – 1 Month Progress Report | Rachel Author Barnard
Pingback: DIY Garden 2020 – Partial Shade PNW Zone 8b/9a – 2 Months Progress Report | Rachel Author Barnard
Pingback: DIY Garden 2020 – Partial Shade PNW Zone 8b/9a – 2 Months Progress Report | Rachel Author Barnard
Pingback: DIY Garden 2020 – Partial Shade PNW Zone 8b/9a – 3 Months Progress Report – Summer’s Ending… | Rachel Author Barnard